Why is My Facebook Pixel Not Working and How to Fix The Issue?
You've just finished installing the Facebook Pixel, but then you realize your Facebook Pixel is not working? Don't worry, this isn't an uncommon issue. Many of my clients have encountered it as well, so I've compiled it into an article covering the most common causes. Stick with me, as I will walk you through why your pixel might be malfunctioning and how to get it back on track.
How to Check if Your Facebook Pixel Actually Working?
Meta Pixel Helper, provided by Facebook, is a browser extension designed to help users diagnose and confirm the setup of the Meta Pixel on their websites. Compatible with Google Chrome and other browsers based on Chromium, this extension enables users to verify the proper functioning of their Pixel and identify any potential errors or implementation issues.
To install Meta Pixel Helper, follow these steps:
- Search for the Meta Pixel Helper extension in your web browser.
- Click on "Add to Chrome".

Click on the "Add the extension" button.
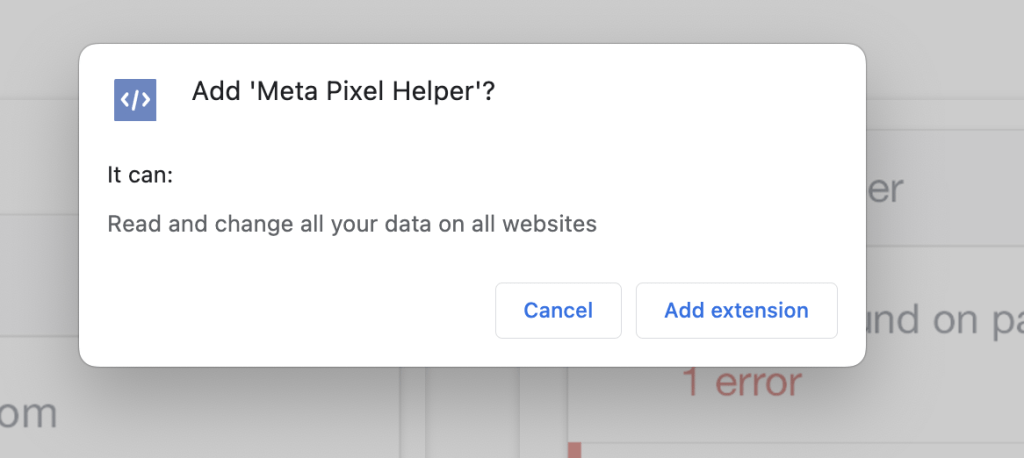
And that's all there is to it! Meta Pixel Helper has been successfully added to your Chrome browser.
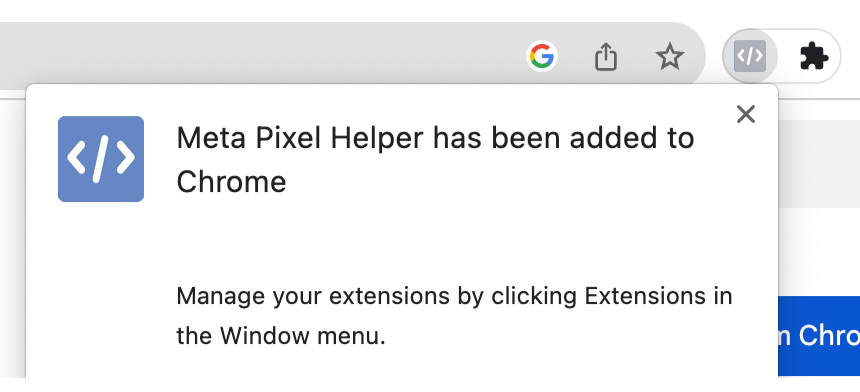
There's just one more step remaining for you. Visit your page and ensure that you have an active Meta pixel that is functioning properly. If it's not, we'll investigate what might have gone wrong with your Pixel setup.
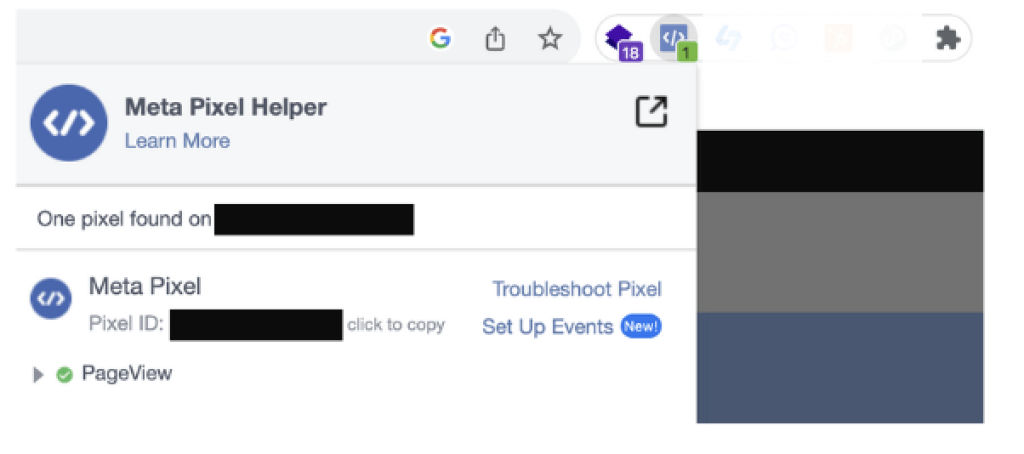
Facebook Pixel Not Working: 9 Common Issues & Solutions
After installing the Pixel Helper and identifying the Facebook Pixel not working issue, it's time to address it. Here are the 9 most common issues, along with effective solutions.
Issue #1 No Facebook Pixel Found
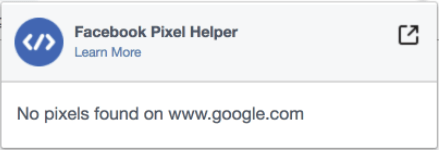
After installing the Facebook Pixel, users sometimes find that Pixel Helper doesn't detect anything. This issue is common among my clients, prompting me to discuss its causes and solutions in this article.
- Outdated Cache
This is an evident issue. If your website uses a caching plugin, it's likely that the Facebook Pixel won't appear immediately due to the serving of old cached content.
Solution: Clear the cache. Depending on your cache settings, this can be as simple as clicking the "delete cache" option within your caching plugin. Occasionally, there are multiple layers of cache, including on your site, server, or even a Content Delivery Network (CDN).
- Browser Cache
This can also pose a problem at times. Your browser might display an outdated version of the page that doesn't trigger the Facebook Pixel.
Solution: Clear the browser cache.
- JavaScript Error
If none of the above solutions work, there might be a JavaScript error caused by other plugins or your theme, which could be blocking the pixel entirely.
Solution: First, identify the issue using your browser's Developer Tools. In Chrome, access settings, navigate to More Tools > Developer Tools (or press CTRL + Shift + I), and click on Console. Check for any errors on the page. Once you pinpoint the problem, try to understand its cause. You may need to deactivate your plugins one by one to identify which one is generating the error.
Issue #2 Facebook Pixel Not Showing in Ads Manager
Sometimes, you might encounter a problem where the title indicates that your pixel isn't appearing when you access the Ads Manager. You've verified in data sources and pixels, and it's firing correctly. However, when you attempt to create a campaign, it prompts you to create a new pixel, almost implying that you don't have one.
Have you linked your pixel to your ad account? Even if the pixel is incorrectly installed on your site, it should still appear (albeit grey and not firing). If it doesn't show up at all, it's likely that you haven't connected the assets in your Business Settings within the Business Manager.
Issue #3 Facebook Pixel Not Active
An ad blocker is often the root cause of this issue. Disabling the ad blocker should resolve the error.
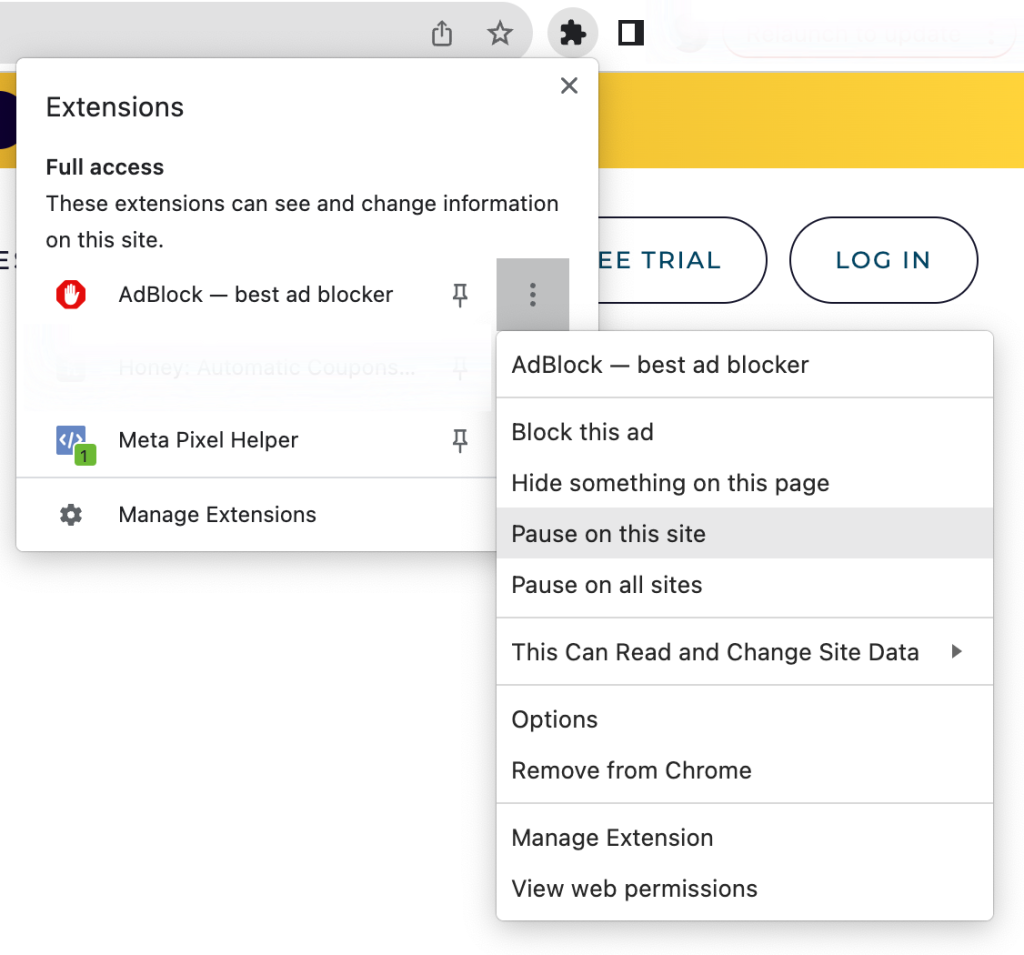
Ad blockers may disrupt the Pixel's capacity to track events accurately, resulting in incomplete or distorted data. For users encountering problems due to ad blockers affecting the site's performance, here's a simple guide to disabling AdBlock:
- Click on the AdBlock button within your browser.
- Choose "Pause on this site".
- Refresh the page to access the complete content.
Issue #4 Facebook Pixel Did Not Load
This indicates that the Pixel Helper has detected the Facebook Pixel code on your website, but the pixel is not transmitting information from your website back to Facebook.
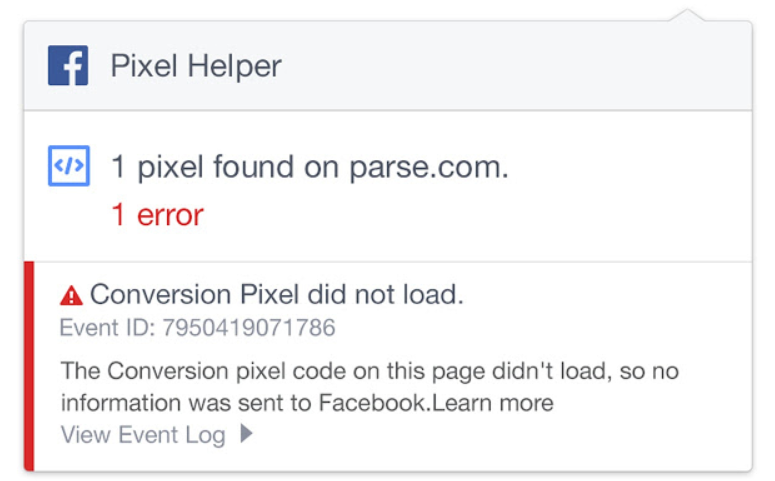
There are 2 possible reasons for this:
- You've configured your pixel to capture data about a dynamic event (e.g., when someone adds an item to a cart on your page). In this case, try clicking on the specific button where you've embedded your pixel code and then recheck the Pixel Helper to see if this resolves the issue.
- There may be an error in your pixel base code. If so, you can attempt to resolve this by removing the Facebook pixel code from your website and then adding it again.
Please refer to the step-by-step instructions provided above on how to carry out this process.
Issue #5 Meta Pixel isn’t Added Correctly
An obstacle frequently encountered when enhancing Facebook Pixel performance is the inaccurate insertion of the Meta Pixel code.
When added incorrectly, the Pixel encounters difficulty in capturing and transmitting crucial
data, resulting in tracking inaccuracies and possible functionality challenges.
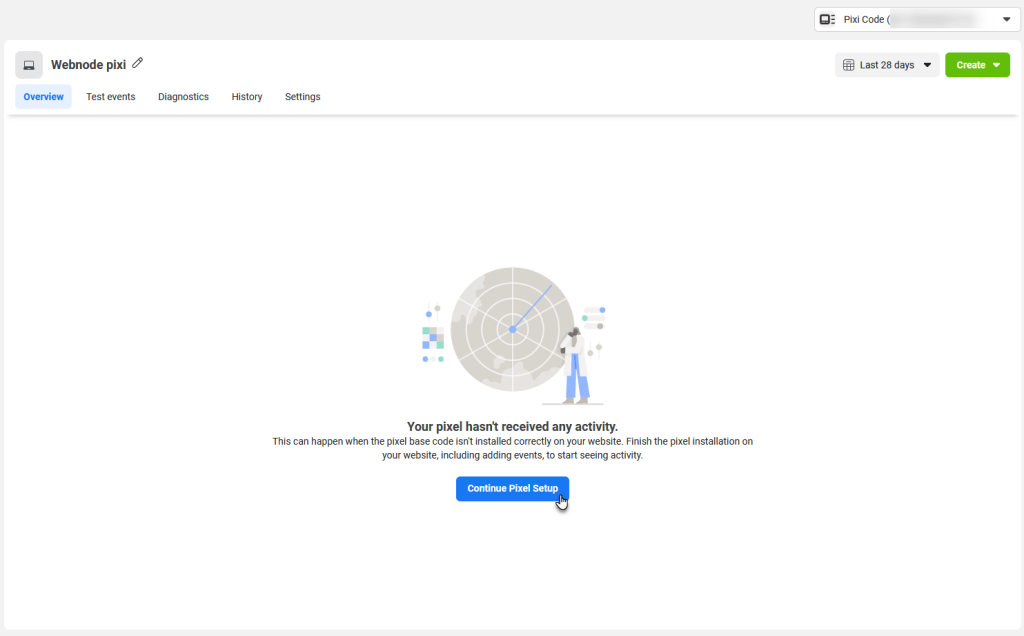
Inspect the Meta Pixel implementation on your website using the Facebook Pixel Helper browser extension. If the extension identifies errors related to Pixel addition, it suggests an issue with how the Meta Pixel code has been integrated.
- Review the Placement of Pixel Code
Check the location of your Meta Pixel code within your website's HTML code. It should be correctly positioned within the <head> section of each page.
- Verify Code Accuracy
Ensure that the Meta Pixel code you've inserted is correct and matches the code provided by Facebook. Even a small discrepancy can result in significant tracking problems.
- Use Tag Managers Cautiously
If you're using a tag manager, make sure that the Meta Pixel code is inserted correctly within the manager. Misconfigurations in tag managers can disrupt proper Pixel functionality.
- Reinstall the Meta Pixel
If issues persist, consider removing the existing Meta Pixel code and reinstalling it.
Issue #6 Facebook Pixel Activated Multiple Times
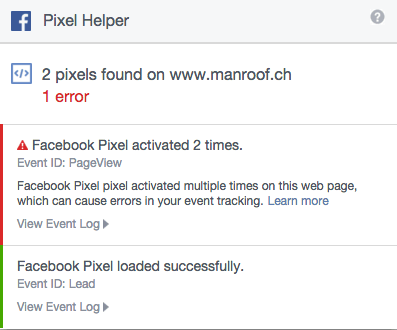
This implies that your Facebook pixel has sent the identical message multiple times to Facebook.
Your Facebook pixel code should be present only once on each page you wish to track. You should modify the code in the header of the affected pages so that the Facebook Pixel code is displayed just once.
Issue #7 Incorrect or Invalid Facebook Pixel ID
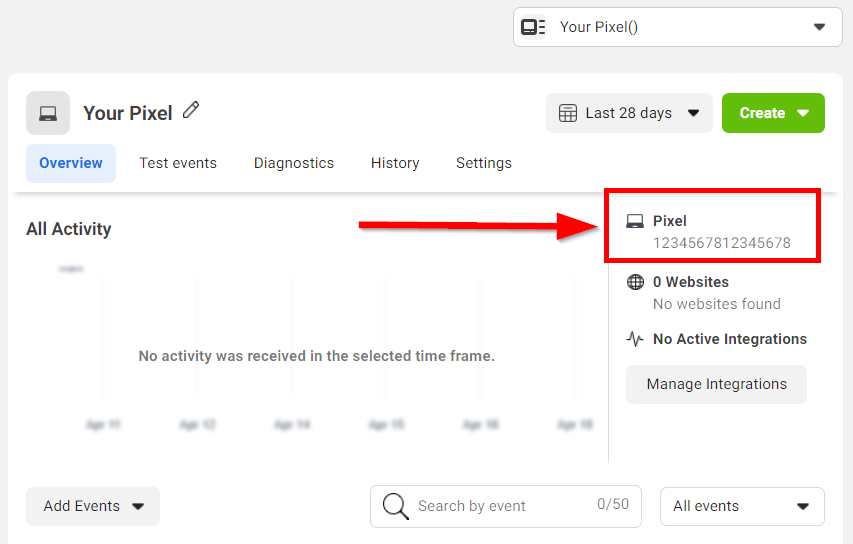
This indicates that Facebook hasn't recognized the pixel ID in your Facebook pixel base code. To resolve this, ensure that the Pixel ID in your code matches the ID on your Facebook Business page.
- Navigate to your business settings homepage within your Facebook Business Manager. On the left-hand side, select "Data Sources" and then "Pixel". You'll find the Pixel ID associated with each pixel listed there.
- Access the header of your webpages. Within your code, locate the line containing fbq('init', 'Pixel ID');. Confirm that the Pixel ID in this section matches the Pixel ID from your Facebook Business page. If they don't match, modify the header code to ensure they align.
Issue #8 No Facebook Pixel ID in Primary Domain
Ensuring the accurate addition of your Facebook Pixel ID to your primary domain is essential for precise data tracking. When the Pixel ID is absent or improperly set up, it can cause issues with data attribution, affecting the efficiency of your advertising efforts.
- Validate Pixel ID Placement
Verify that the correct Facebook Pixel ID is included in your website's code and matches the ID linked to your Facebook Ads account.
- Review Primary Domain Settings
Ensure in your Facebook Business Manager that the primary domain is accurately specified, and the Pixel ID is linked to the appropriate domain. Any discrepancies can lead to tracking inaccuracies.
- Reconfigure Pixel ID if Needed
If errors persist, consider removing and re-adding the Pixel ID. Follow the recommended setup steps meticulously to ensure proper configuration.
Issue #9 “Not a Standard Event”
You'll encounter this code if you've created a custom conversion that deviates from Facebook's standard events. To align with Facebook's standard events, you should adjust your events accordingly. It's advisable to use Facebook's official standard events for tracking registrations, purchases, contacts, and page views.
Here is a comprehensive list of standard events for your Facebook Pixel:
- Add Payment Info
- Add to Cart
- Add to Wishlist
- Complete Registration
- Contact
- Customize Product
- Donate
- Find Location
- Initiate Checkout
- Lead
- Purchase
- Schedule
- Search
- Start Trial
- Submit Application
- Subscribe
- View Content
In rare instances where you need to track a custom event that doesn't fall under Facebook's standard events, you can disregard this error message.
Expert Advice on Setting up and Troubleshooting Facebook Pixel
As an advertising expert with nearly 10 years of experience running Facebook ads, I have valuable advice to offer regarding the setup and troubleshooting of Facebook pixel.
1. Accurate and Complete Pixel Setup
- Follow the Guided Steps: Carefully follow the Facebook Pixel setup instructions to ensure you don't miss any crucial steps.
- Double-Check Pixel ID: Verify that the pixel ID you're using matches the one in your Facebook Business Manager to avoid errors.
- Strategic Pixel Placement: Place the pixel code within the <head> section of your website's HTML for optimal functionality. Consider using a tag management system for easier implementation and maintenance.
2. Use Facebook Pixel Helper
- Install Pixel Helper: Install the Facebook Pixel Helper Chrome extension to diagnose any technical issues with your pixel code.
- Regularly Check Pixel Helper: Regularly check the Pixel Helper to identify and resolve potential problems early on.
- Validate Pixel Functionality: Use Pixel Helper to verify that the pixel is firing events correctly and capturing accurate data.

3. Leverage Professional Pixel Setup Tools
If you've followed all the steps but still encounter difficulties with setting up the Facebook pixel, consider leveraging specialized apps in this area, such as Two Owls- Omega Facebook Pixel.
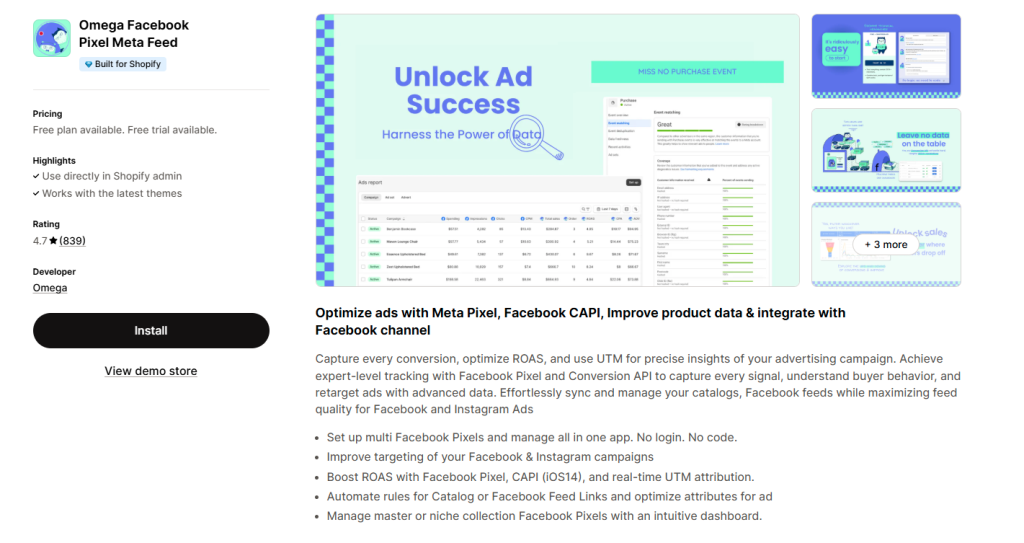
Developed by experts in the field, Omega Facebook Pixels simplifies the process of setting up the Facebook pixel and ensures a high likelihood of success.
With Omega Facebook Pixels from Two Owls, you can:
- Install Facebook Pixel within 2 minutes, with automatic tracking of all events, no login or coding needed.
- Speed up the learning process with insightful data from Facebook Pixel and Conversion API (IOS14).
- Improve ROAS optimization with a real-time UTM attribution report that tracks every ad.
- Manage master or niche collection Facebook pixels through an intuitive dashboard.
- Save time on manual product updates by using automated catalogs or live feed links.
Wrap up
I believe that after reading this article, you will have an answer to the question: "Why is my Facebook pixel not working?", and how to fix the Facebook Pixel issue. Resolving issues with the Facebook Pixel not working is essential for maintaining accurate data tracking and maximizing advertising effectiveness.
Using tools such as Facebook Pixel Helper extension and verifying pixel IDs and domain settings can aid in troubleshooting. With proactive efforts to identify and resolve issues, advertisers can ensure the smooth functioning of their Facebook pixel, leading to improved ad targeting and campaign results.
Deduplication in Facebook Pixel: How to Fix Duplicate Events and Track Data Correctly
Event Match Quality: Definition, Benchmarks & How to Improve It
How to Install Twitter Pixel: Every Method You Should Know

Facebook Ad In Review: How Not To Get Stuck In 2026


